Self-study weight-loss yoga tutorial 3 times a week to get slimmer (picture)
Yoga instructors point out that if you want to have a gorgeous and beautiful body, there is no better way than regular yoga movements. The following series of movements not only shapes the body shape as a whole, but also exercises and achieves balance from front to back, and from toes to fingertips. After completing this routine, you will regain your confidence because of your beautiful body shape.
This set of movements should be done at least 3-4 times a week, and the movements should be repeated 3-5 times each time. It takes about 30 minutes in total. If you master these movements and stick to it, you will find that your body shape is undergoing gratifying changes.
The action steps are as follows:

Step 1: Chair position
First maintain a standing posture, feet together, chest out and abdomen in. Then slowly squat down on your hips as if you were sitting on a chair, while slowly stretch your arms upward, stop when they reach the highest point (note that the arms should be shoulder width), and begin to exhale. Hold this position and breathe evenly 5-8 times.
Step 2: Step into step
Raise your arms upward and chest your chest out and abdomen your abdomen, swing your left leg backward to form a lunge, and bend your right leg to maintain 90 degrees from your ankle. Hold this position and breathe evenly 5 times.
Step 3: Arch Bridge Style
Put your hands back on the ground, lean back your newly bent right leg to balance it with your left leg, then straighten your feet, keep moving your hands forward, and move your feet backward until your hips are tilted and your arms away from your ears. Hold this position and breathe evenly 5 times.

Step 4: Forty-five-degree posture
Put down the raised buttocks from the previous step, legs backward, and support your body with your hands until your arms form a 45-degree angle with your body. Hold this position, tighten your abdominal muscles, and breathe evenly 5 times.
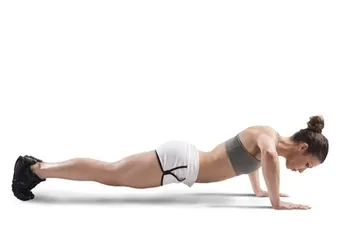
Step 5: Tablet type
Put down the hands that supported the body in the previous step and bend your elbows to 90 degrees to support the body while keeping the entire body in the same straight line. Hold this position and breathe evenly twice.
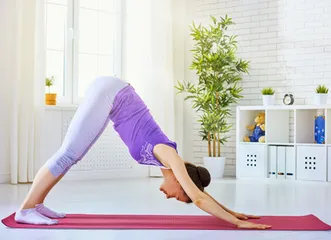
Step 6: Forward Form
Based on the previous movement, push your feet backwards with your hips towards the ceiling, while straightening your arms to support the ground and bulge your upper body forward. Hold this position and breathe once.

Step 7: Lunge Twist
Return to step 2 and combine your hands to form a praying posture. Then his entire body continued to twist from left to right. Just twist it 5 to 8 times, pay attention to the traditional Chinese medicine chest and abdomen during the twisting process.
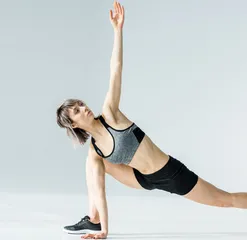
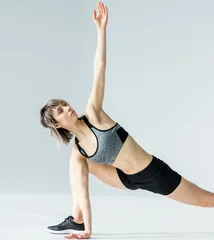
Step 8: Half Moon Style
Put the entire body back into the center, then straighten your right leg, extend your left leg outward, and then support the ground with your right hand. Stretch your left hand up and point your fingers towards the ceiling. Hold this position and breathe evenly 5 times.
Step 9: Half Moon Rotation
Based on the previous position, twist your hips so that your right hand is off the floor, and replace it with your left hand to support the ground, with your right fingers facing the ceiling hard. Hold this position and breathe evenly 5 times.
Step 10: Upright
Lower your right hand and face your head vertically downward to form a support for your body with both hands. Then slowly stretch your left leg upward with your toes towards the ceiling. Hold this position, breathe for 5 times, change to stretch your right leg upward, and repeat the above actions.