2 groups of stovepipe and buttocks, yoga, convex front and back, charming men (photo)
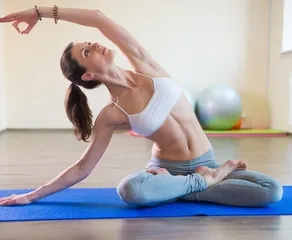
Stovepipe and Hip Yoga 1. Tree Front Bend Yoga

STEP1
Open your feet to the sides (the width is about the length of your own leg), with your toes facing forward, and your hands at your waist.
STEP2
Inhale, extend your spine upward, open your hands to the side, shoulder height, and palms down.

STEP3
The palm of your right hand is pressed to the ground, and the left hand is extended upward. The pelvis does not move and is twisted from the waist. Slowly lift your head, look at your left hand, open your chest and pelvis as far as possible, and hold for 5 to 10 breaths.
Tips: If you have a neck injury, you can keep your head straight in front of you and don't have to turn.
STEP4
Inhale in and straighten your body, then repeat the action on the other side.

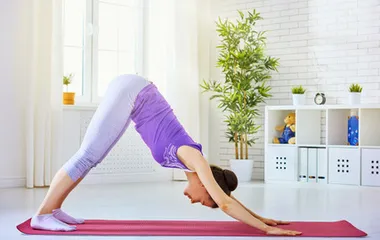
If you want to have a straight and crooked peach hip shape, it is recommended to do more bridge movements in yoga. Use the strength support of the gluteus maximus and thighs to strengthen and tighten the muscles of the buttocks and legs, and even eliminate fatigue on your feet. Prevent varicose veins!
Stovepipe Yoga 2. Bridge Yoga

STEP1
Lay your body flat on the ground with your knees bent to be as wide as your pelvis. Place your feet parallel to the floor, put your palms on the ground, and your fingers touch your heels slightly.
TIPS Keep your feet parallel, neither outside nor inside, and your knees do not exceed your toes.
STEP2
Inhale and lift your hips up until your back is completely off the ground. Keep your shoulders against the ground and never leave the ground. Keep the head in the middle and not askew.
TIPS Don't hold your breath. Keep your head and body straight and not askew.

STEP3
Keep breathing and retract your shoulder blades when you inhale again. Hold your hands under your body, straighten your elbows, tighten your hips, and move your collarbone up as close as possible to your chin. Hold for 5 to 10 breaths.
STEP4
Exhale, slowly release your hands and return to your sides. Then place your body back on the floor one by one from the upper back, middle back, lower back, and buttocks.
STEP5
Maintain your upper body flat with your knees bent, and wrap your hands around your knees close to your chest. Shake your body left and right to relieve the pressure and tightness on your back.